 Welcome
 Linux
Linux Unix
Unix Download
Encourage FUNIX
The consultation of the site is completely free and without advertisements. Donations are nevertheless appreciated to pay for hosting and encourage its author
Multimedia
Video editing
- The basics of video editing
- Installation of video editing software
- Editing your video with Kdenlive
- Editing your video with Cinelerra
- Editing your video with OpenShot Video Editor
- Editing your video with Pitivi Video Editor
- Editing your video with Flowblade Video Editor
- Editing your video with Shotcut
- Installation of video editing software
- Editing your video with Kdenlive
- Editing your video with Cinelerra
- Editing your video with OpenShot Video Editor
- Editing your video with Pitivi Video Editor
- Editing your video with Flowblade Video Editor
- Editing your video with Shotcut
Edit your video with kdenlive
Network and system
Email management
Video Calibration with Kdenlive
Last modified
August 2, 2024
This site has been automatically translated with Google Translate from this original page written in french, there may be some translation errors
This page is part of a tutorial to explain video
editing with kdenlive and which includes the following topics:
This site has been automatically translated with Google Translate from this original page written in french, there may be some translation errors
Object
What is
called video calibration is often the last step of
editing, the finishing touch so to speak, it allows you to
modify the contrast, brightness or colors of your video to
give it a particular rendering. kdenlive offers powerful tools
and not necessarily very easy to use. By switching the
display mode to color, you can see on the left the main
analysis tools, from top to bottom as well as the
histogram on the right.
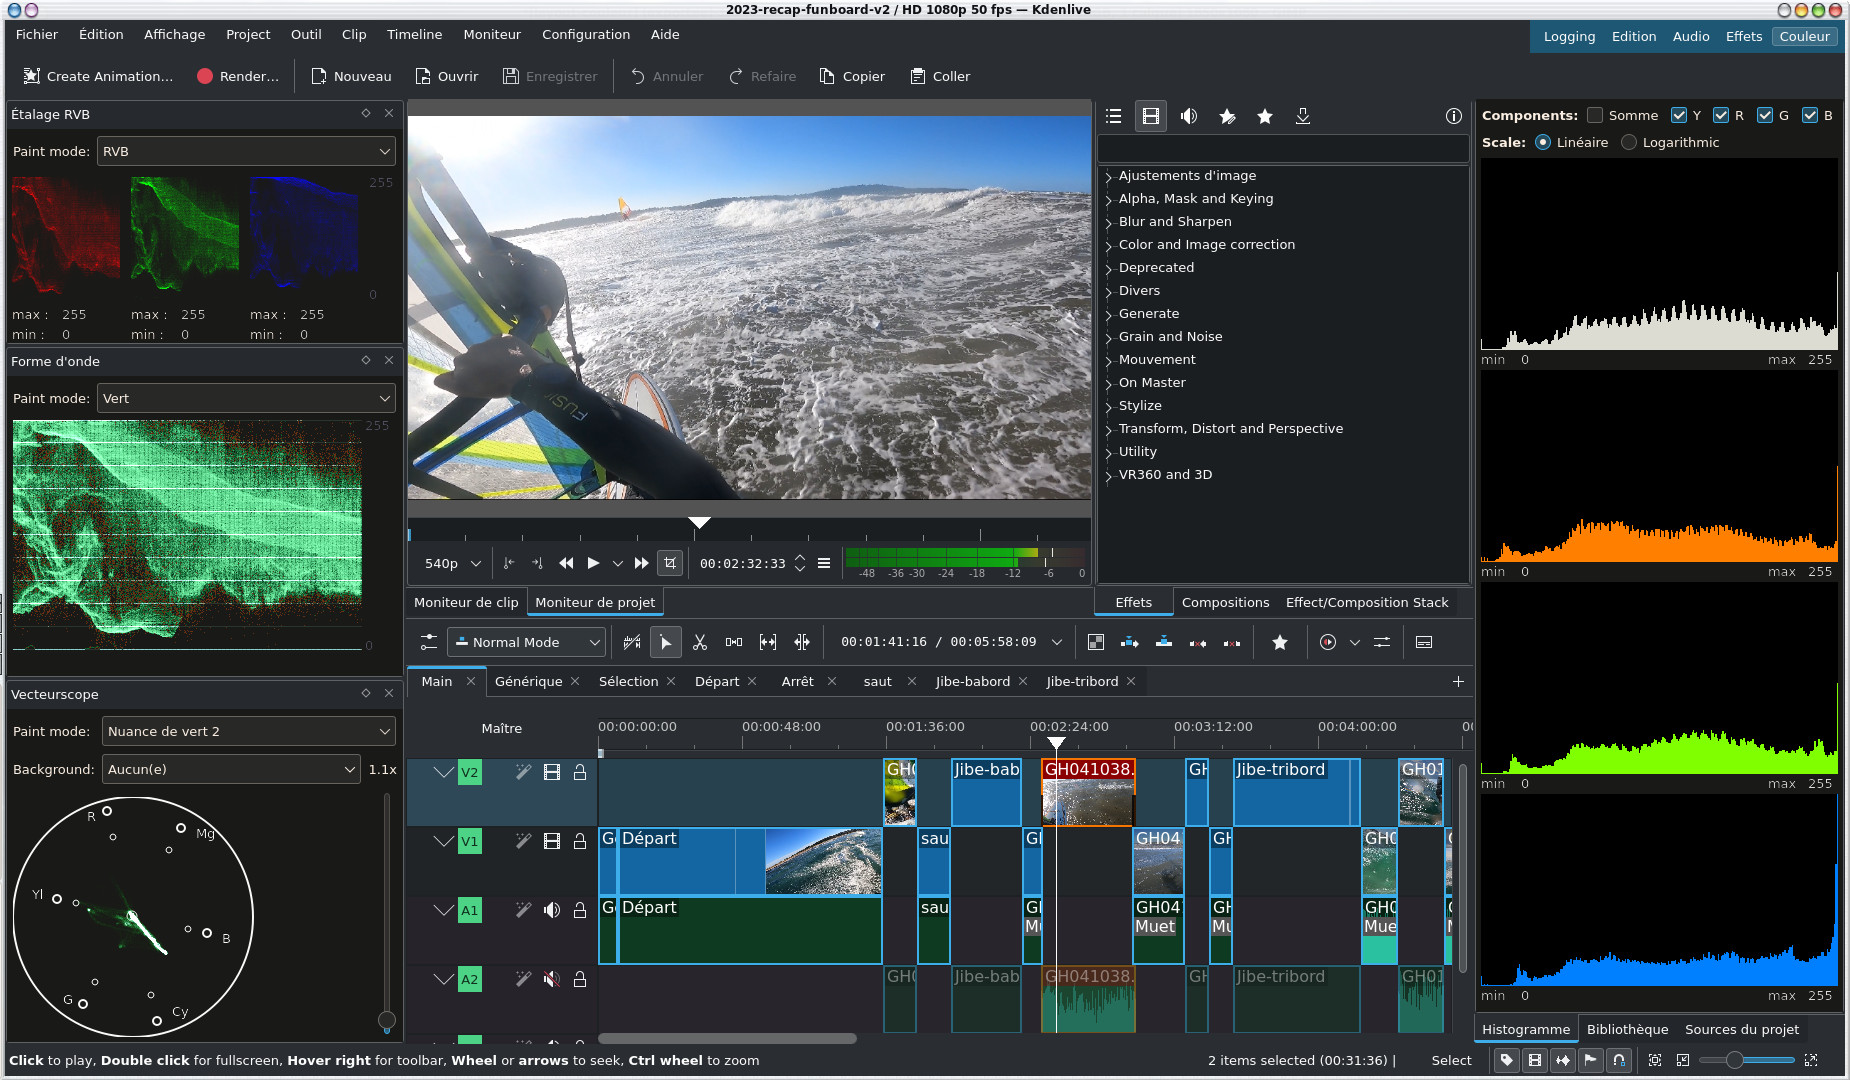
- RGB display: an image is made up of a mixture of the primary colors Red, Green and Blue, this tool allows you to visualize the distribution of its 3 components, we call this chrominance.
- the waveform : which gives the brightness of the image or luminance
- the vectorscope: which allows you to display a color wheel to make colorimetric corrections to the image, a saturated (intense) color will be further from the center unlike a dull image which will be closer to the center.
- the histogram : these curves give
the histogram of the luminance of each color component
of the video, the luminance evolves from 0 to 255 on
the abscissa axis, the ordinate corresponds to the
number of pixels with the luminance concerned on the
currently selected image. Basically at 0, the image
has no luminance, so it is black and at 255, the color
is very intense.
Setting
all this up is very complex so I can only refer you for
now to the kdenlive manual ( Histogram Manual , RGB Spread and Waveform
Manual , Vectorscope Manual ).
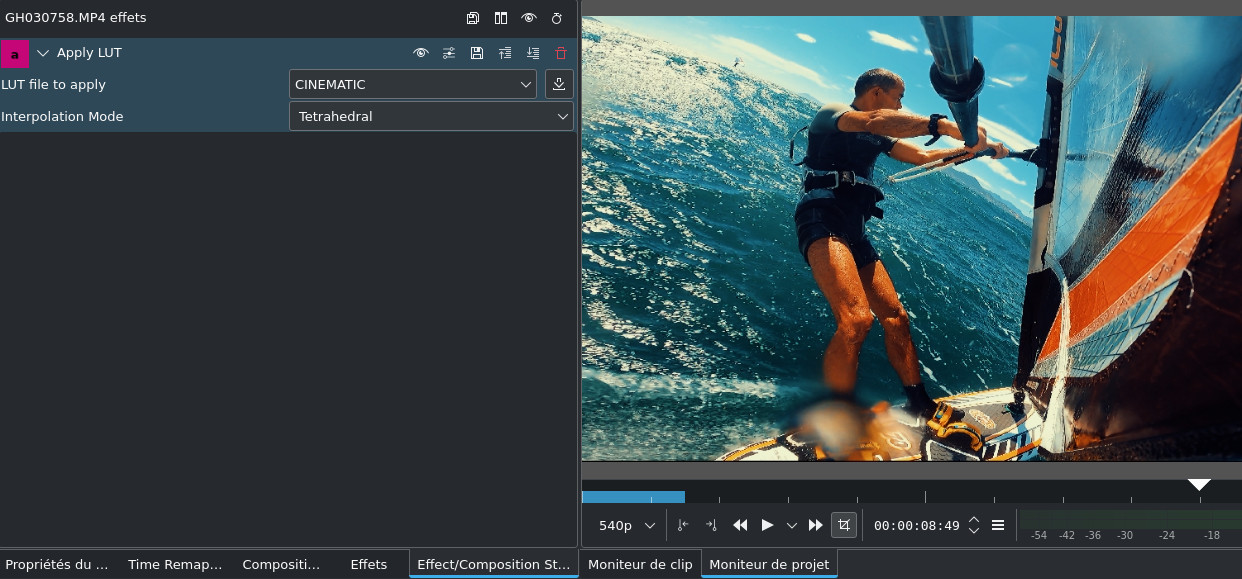
To make it
simple, we can simply apply certain color correction
effects such as white balance or apply a LUT (Look Up
Table) model which is a set of preconfigured values to
modify the rendering of the video. We will use the Apply LUT effect, 4 models are
available by default.
By clicking on the button
 you can download
other models made available to the community or you can
find them on the internet, kdenlive supports LUTs created
by After Effects ( .3dl ), Iriadas ( .cube ), DaVinci Resolve ( .dat ) and Pandora ( .m3d ) that you can
download by choosing Custom... in the drop-down list
of models. Sites like this one offer them for
download, you will have to register but it is worth it.
you can download
other models made available to the community or you can
find them on the internet, kdenlive supports LUTs created
by After Effects ( .3dl ), Iriadas ( .cube ), DaVinci Resolve ( .dat ) and Pandora ( .m3d ) that you can
download by choosing Custom... in the drop-down list
of models. Sites like this one offer them for
download, you will have to register but it is worth it.
| Back to FUNIX home page ] |